@TOC
1.时间工具
- timedatectl 时间和时区管理

#查看日期时间、时区及NTP状态:
timedatectl

#查看时区列表:
timedatectl list-timezones

#修改时区:
timedatectl set-timezone Asia/Shanghai

#修改时区
root@ubuntu2004:~# rm -f /etc/localtime
root@ubuntu2004:~# ln -s /usr/share/zoneinfo/Asia/Shanghai /etc/localtime

#修改日期时间:
timedatectl set-time "2017-01-23 10:30:00"
#开启NTP:
timedatectl set-ntp true/false- ntpdate 时间同步命令,CentOS8版本此命令已淘汰
- system-config-date:图形化配置chrony服务的工具
2.时间同步服务
2.1.ntp
2.2.chrony

3.配置文件chrony.conf
官方文档: https://chrony.tuxfamily.org/doc/3.5/chrony.conf.html
server #可用于时钟服务器,iburst 选项当服务器可达时,发送一个八个数据包而不是通常的一个数据包。 包间隔通常为2秒,可加快初始同步速度
pool #该指令的语法与server 指令的语法相似,不同之处在于它用于指定NTP服务器池而不是单个NTP服务器。池名称应解析为随时间可能会变化的多个地址
driftfile #根据实际时间计算出计算机增减时间的比率,将它记录到一个文件中,会在重启后为系统时钟作出补偿
rtcsync #启用内核模式,系统时间每11分钟会拷贝到实时时钟(RTC)
allow / deny #指定一台主机、子网,或者网络以允许或拒绝访问本服务器
cmdallow / cmddeny #可以指定哪台主机可以通过chronyd使用控制命令
bindcmdaddress #允许chronyd监听哪个接口来接收由chronyc执行的命令
makestep # 通常chronyd将根据需求通过减慢或加速时钟,使得系统逐步纠正所有时间偏差。在某些特定情况下,系统时钟可能会漂移过快,导致该调整过程消耗很长的时间来纠正系统时钟。该指令强制chronyd在调整期大于某个阀值时调整系统时钟
local stratum 10 #即使server指令中时间服务器不可用,也允许将本地时间作为标准时间授时给其它客户端
4.centos6 ntp客户端同步检查
yum -y install ntp

yum list ntp

/etc/init.d/ntpd start

ntpq -p
5.案例安装chrony并校准时间同步
yum list chrony

# 安装软件chrony
yum -y install chrony

date -s '2 year' # 增加2年
date -s '2 day' # 增加2天

# 查看服务状态
systemctl start chronyd.service
systemctl status chronyd.service

# 更改配置文件
vim /etc/chrony.conf
pool ntp.aliyun.com iburst
allow 10.0.0.0/24
local stratum 10

# 重启服务
systemctl restart chronyd.service

# 查看时间同步源
chronyc sources -v
# 立即手工同步
chronyc -a makestep
# 查看时间同步源状态
chronyc sourcestats -v
# 设置硬件时间
# 硬件时间默认为UTC
timedatectl set-local-rtc 1
# 校准时间服务器
chronyc tracking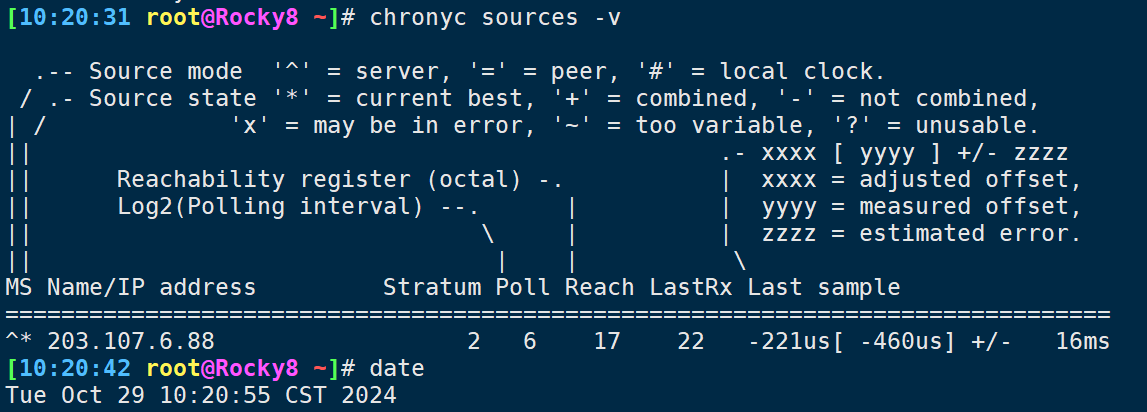
6.chronyc交互式
# 启动几台机器
# 更改配置文件
vim /etc/chrony.conf
pool 10.0.0.7 iburst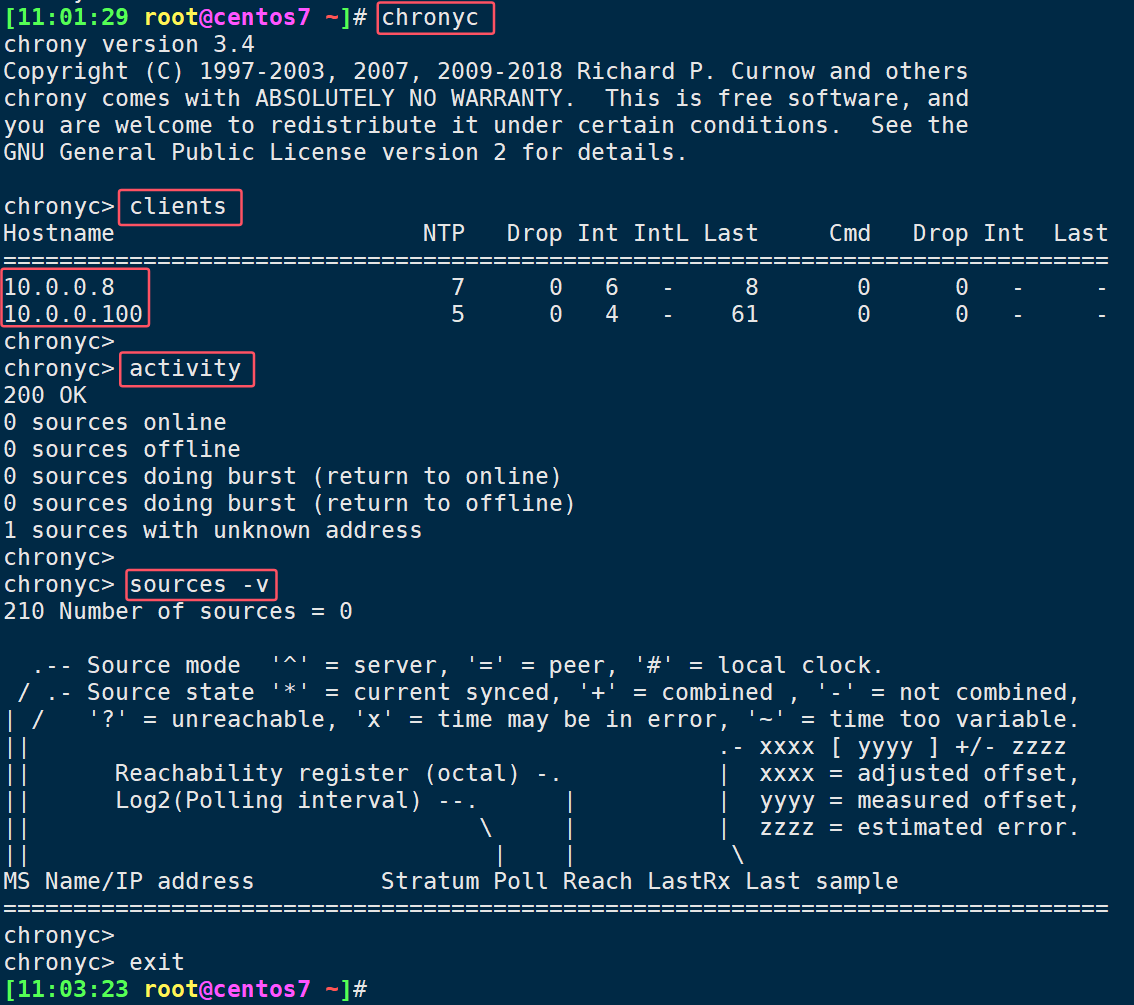
7.实现私有的时间服务器
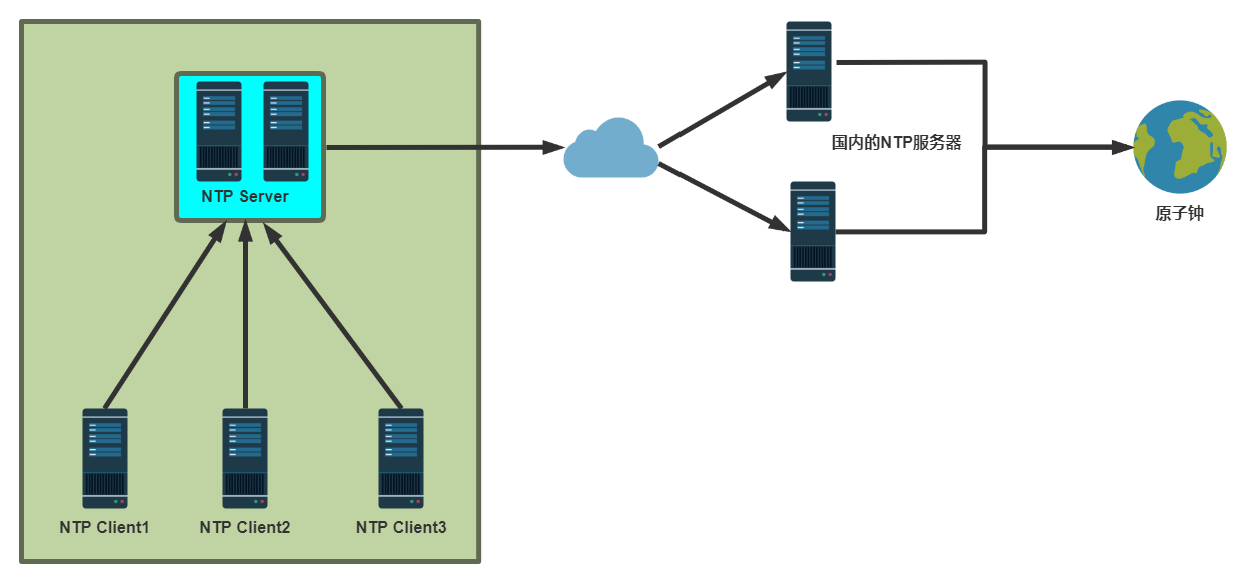
| 名称 | 主机 |
|---|---|
| 服务器 | 10.0.0.7 |
| 客户端 | 10.0.0.8 |
| 客户端 | 10.0.0.9 |
| 客户端 | 10.0.0.100 |
7.1.服务器配置123
- 安装软件
[11:03:23 root@centos7 ~]# hostname -I
10.0.0.7

yum -y install chrony
apt -y install chrony- 编辑配置文件
vim /etc/chrony.conf

server ntp.aliyun.com iburst
server ntp1.aliyun.com iburst
server ntp2.aliyun.com iburst

#allow 192.168.0.0/16
allow 0.0.0.0/0 #加此行,指定允许同步的网段

# Serve time even if not synchronized to a time source.
local stratum 10 #删除此行注释,当互联网无法连接,仍然可以为客户端提供时间同步服务- 重启服务
systemctl restart chronyd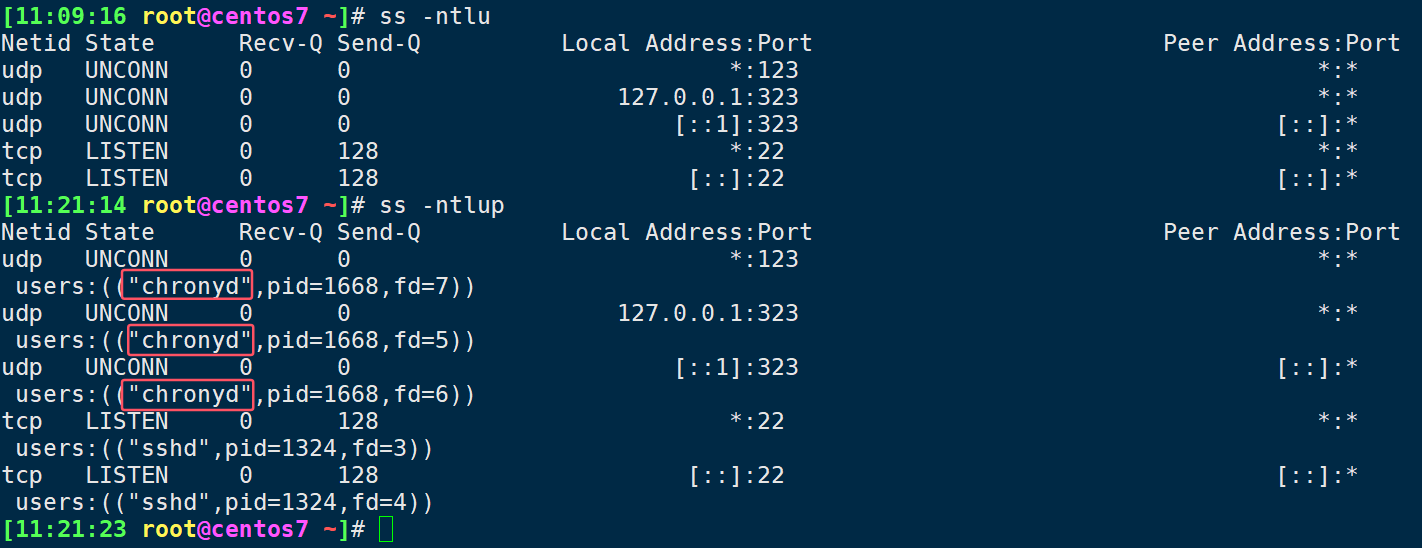

7.2.客户端配置323
- 修改配置文件
[10:42:59 root@Rocky8 ~]# vim /etc/chrony.conf
server 10.0.0.7 iburst- 重启服务
[10:59:25 root@Rocky8 ~]# systemctl restart chronyd- 确认同步成功
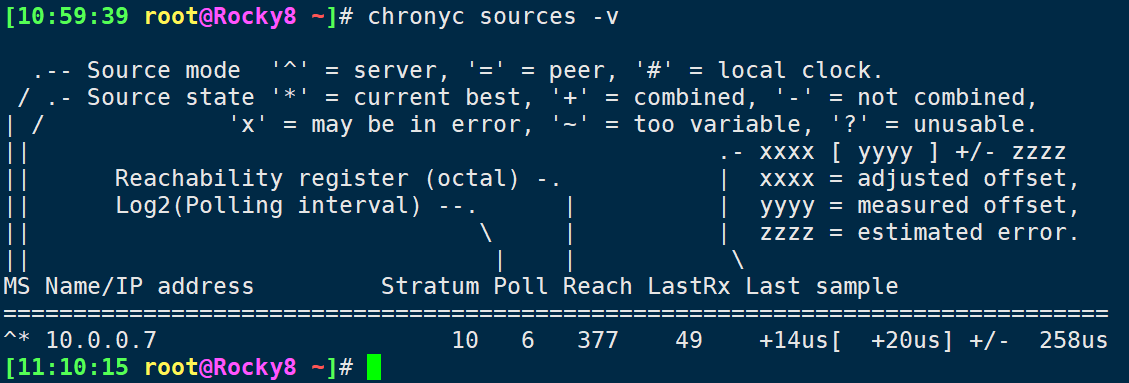
chronyc sources -v

# ubuntu
chronyc -n sourcestats
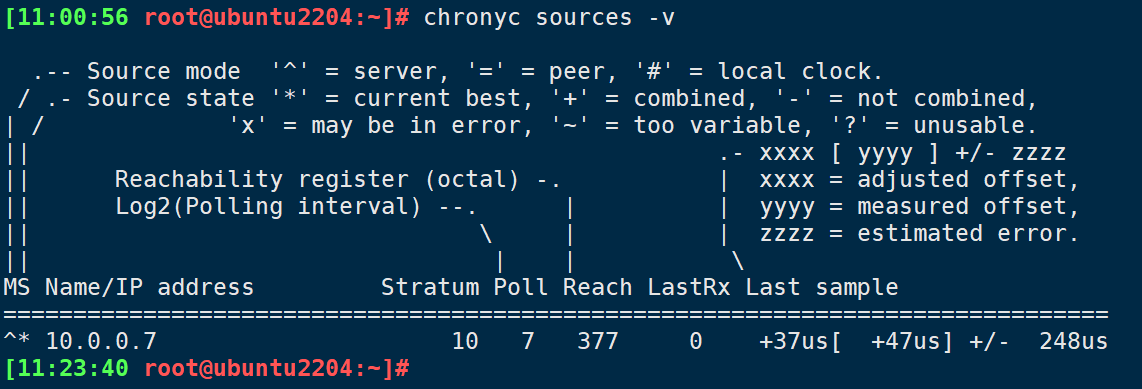

说明:
^* #已同步
^? #未同步
192.168.2.25 #时间服务器IP
8.时间同步chrony脚本
cat chrony_date.sh #!/bin/bash
export PATH=/usr/local/sbin:/usr/local/bin:/usr/sbin:/usr/bin
. /etc/os-release
chrony_date(){
if [[ ${ID} =~ ^(rocky|centos|rhel) ]];then
rpm -q chrony &>/dev/null || yum -y install chrony &>/dev/null
sed -Ei.bak 's/^server .*/server ntp.aliyun.com iburst/' /etc/chrony.conf
#sed -Ei.bak 's@#allow .*@allow 0.0.0.0/0 #加此行,指定允许同步的网段@' /etc/chrony.conf
#sed -Ei.bak 's@#local stratum 10@local stratum 10 #删除此行注释,当互联网无法连接,仍然可以为客户端提供时间同步服务@' /etc/chrony.conf
systemctl enable --now chronyd.service
elif [[ ${ID} =~ ^(ubuntu) ]];then
dpkg -V chrony &>/dev/null || apt -y install chrony &>/dev/null
sed -Ei.bak 's/^pool ntp.ubuntu.*/pool ntp.aliyun.com iburst/' /etc/chrony/chrony.conf
sed -Ei.bak 's/^pool .*ubuntu.pool.*//' /etc/chrony/chrony.conf
systemctl start chronyd
fi
}
chrony_date
评论